Unity - Shuriken Editor Glossary
What follows is a basic overview of each node and menu for the Shuriken particle editor. Shuriken is a new system to Unity that allows you more control over creating particle emitters.
To start, go GameObject>CreateOther>Particle System.
To start, go GameObject>CreateOther>Particle System.
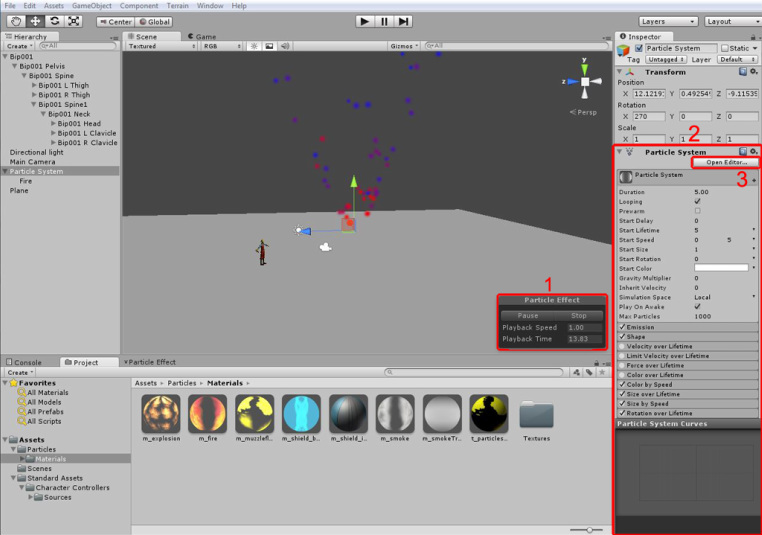
The Particle effect window appears in the corner of the scene window (1), this lets you simulate your particle system in real time as well as pause (useful for working editing, especially with a burst system. This window also lets you change the speed and stop it entirely for when you want to get it out of the way or reset the simulation.
Under the inspector you have your usual set of options as well as the particle system editor which you can use to change most aspects of a single system. (2)
In the inspector window you have a limited view of the nodes that can be edited. If you plan on making a simple system composed of one simulation its possible to work from this window. But for more room and access to some more features you can click the open editor button (3) which opens up the editor in its own dedicated window which can be dragged around and snapped to a toolbar. (For the purposes of this tutorial I snapped it to the bottom toolbar)
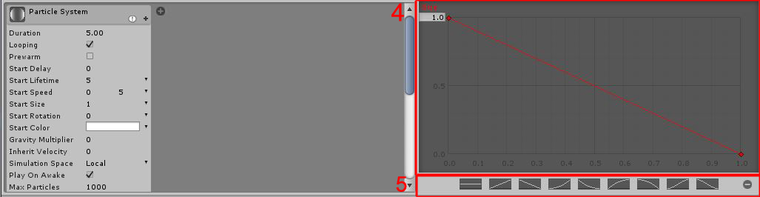
The large grey grid is the curve editor (4) which is useful when making more advanced particles and can give you control over things such as size and colour over lifetime. This also includes some presets across the bottom of the window to quickly set up your curves (5).
Particle System (This field can be renamed)
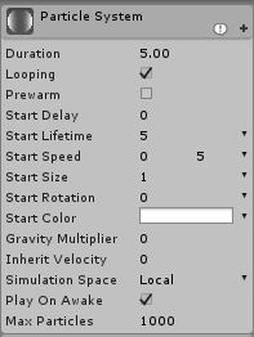
(or whatever you named your system): some of the most common features for the overall behaviour of the current system.
-Duration: Duration affects how long the particle system lasts, it may appear the system lasts forever but this is just because looping is on in the screen window. -Looping: Whether the system loops after it is completed. -Prewarm: Starts the particle system as if its been running for a while, useful for when you want fully formed effects from systems with slow activity such as mist or billowing smoke. -Start Delay: Sets a delay before the simulation starts, useful when you have multiple systems and you want one effect to follow another for example a shield that lasts for a few seconds and then pops like a bubble, I would create a burst particle that starts as soon as the shield particle finishes. |
|
-Start lifetime: Start lifetime affects how long each individual particle in the system to last. Through the options menu you can set this to be a random amount between 2 curves or constants by clicking the little black arrow in this field.
-Start speed: How fast you want the particles to move initially. Through the options menu you can also set this to have a random value between 2 constants or 2 curves by clicking the little black arrow in this field.
- Start size: how large you want the average particle to be, I say average because if you choose to edit the size over lifetime this essentially becomes the midpoint in the curve editor Ive found. Like other nodes this one has a series of options that allow for a randomisation between 2 constants or curves by clicking the little black arrow in this field.
-Start rotation: Start Rotation allows you to change the initial rotation of particles in degrees. This is useful for creating more variation or correcting he angle of a material. Through the options menu you can also set this to have a random value between 2 constants or 2 curves by clicking the little black arrow in this field.
-Start Colour: Start colour allows you to set the default colour of the particles, if you're using a different material to the default its essentially multiplying the pixels by this colour. Also lets you change the alpha for when you want to make things more transparent. The gradient option allows you to affect the colour blending based on the duration of the system, making the colours change slightly for each new particle spawned until the loop is over.
-Gravity Multiplier: The gravity multiplier allows you to control the degree in which gravity affects the particles, the greater the value the more downward force is applied to the particles. Ive found this useful for explosions as well as water based particles such as spraying or waterfalls.
-Inherent Velocity: I haven’t actually figured out a use for this one, it doesn’t seem to affect the particles velocity. When I figure it out this entry will be updated.
-Simulation Space: Simulation space affects how particles interact with world space, setting them to world means that they aren't affected when the particle emitter is moved which is better for things like a fire if its parented to something like a tank or a car and allows the particles to trail behind it. Setting it to local means that all particles emitted from this system will remain relative to the origin of the system regardless of movement.
-Play on Awake: Play on awake controls whether the particle system plays as soon as its placed or if you just have them in an environment and you want to play them with a trigger you tick this off and play it through a script.
-Max Particles: Max particles simply affects how many particles are allowed to be visible from this emitter at one time. Change this if you want more control over optimising your particle systems.
Emission
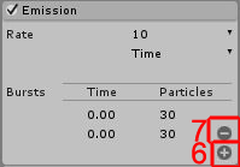
This node is fairly simple but is one of the most important in the editor, it lets you control how many particles spawn and how they spawn.
By default they will be set to a constant spawn rate of particles that spawn one at a time. |
|
Rate: Rate controls how many particles are spawned per second each loop of the system. It can be set to a constant rate through the drop down menu or set to a curve which gives you greater control over how many spawn during each loop. Alternatively you can set it to emit particles per unit of distance allowing you to space particles out a bit more.
While emission rate is set to time you can also create a burst of particles at once per loop. Clicking the plus sign (6) creates a new burst where you can setup the amount of particles in the burst as well as a time delay. The minus sign (7) deletes the most recently added burst. You can add up to 4 bursts per system.
While emission rate is set to time you can also create a burst of particles at once per loop. Clicking the plus sign (6) creates a new burst where you can setup the amount of particles in the burst as well as a time delay. The minus sign (7) deletes the most recently added burst. You can add up to 4 bursts per system.
Shape
Shape defines the volumetric shape of the mesh in which the particles are emitted from. This mainly affects their direction and spawning location. You have a number of different volume shapes to choose from and each shape can be edited to and extent.
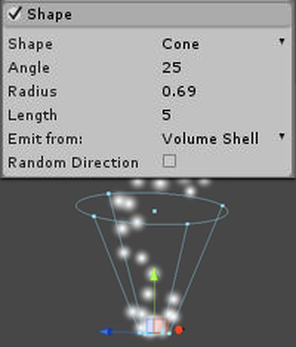
Cone The cone shape by default emits particles from the base of the volume in a matter that typically makes the particles space out a bit more over their lifetime. Cone options include: -Angle: the degree in which the cone spreads over lifetime, can be increased or decreased to the point where the volume is a perfect cylinder. |
|
-Radius: The radius of the base of the cone where particles spawn from by default.
-Length: Length affects the overall length of the volume. This only becomes enabled when the Emit from location is set to either volume or volume shell.
-Emit From
Here you can select where the particles would emit from, by default they emit from the base of the cone based on its radius. Other options include:
-Base Shell: Particles only emit from the surface of the volume at the base and travel across the surface of the volume without entering it (depending on the gravity setting this may not be the case.)
-Volume: Volume causes particles to spawn anywhere within the volume of the shape.
-Volume Shell: Volume Shell causes particles to spawn anywhere on the surface of the volume.
-Random Direction: Randomises the trajectory of particles.
|
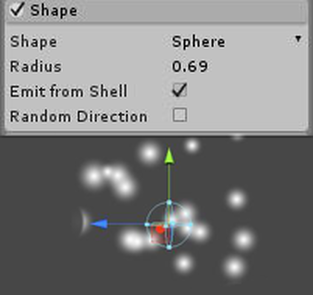
Sphere
The sphere shape emits particles traveling in every direction by default. Its other properties are: -Radius: Affects the radius of the sphere volume allowing you to increase the size. -Emit from shell: Emit from Shell causes particles to spawn anywhere on the surface of the volume. -Random Direction: Randomises the trajectory of particles. |
|
|
Hemisphere
The hemisphere shape acts a lot like half a sphere volume emitting only the top half of a spheres directions. -Radius: Affects the radius of the sphere volume allowing you to increase the size. -Emit from shell: Emit from Shell causes particles to spawn anywhere on the surface of the volume. -Random Direction: Randomises the trajectory of particles. |

|
|
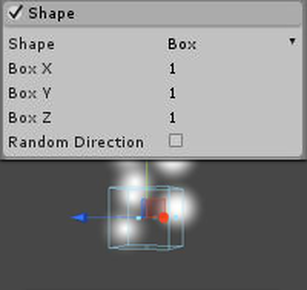
Box
Box creates a fairly standard cube shaped volume emitting particles in the y axis. The dimensions of the cube are fully changeable allowing any rectangular prism or even a flat plane. -Box X: Affects the length of the X dimension of the box. -Box Y: Affects the length of the Y dimension of the box. -Box Z: Affects the length of the Z dimension of the box. -Random Direction: Randomises the trajectory of particles. |
|
|
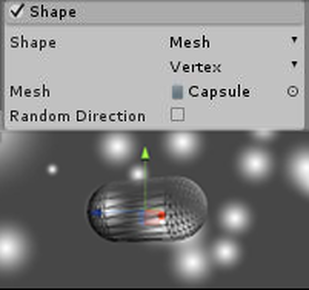
Mesh
Mesh allows you to use an existing mesh from the assets folder to use as a surface to emit from. This however is far more expensive than using the other shape options. If you have a specific shape of a cube or a plane its best to try and recreate it using the box shape. This can be useful for specific effects such as a flaming sword. -This shape has a drop down menu that lets you set whether the particles are emitted from the mesh's verticies, edges or faces. -Random Direction: Randomises the trajectory of particles. |
|
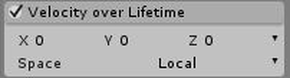
Velocity Over Lifetime
|
Velocity Over lifetime affects the angular velocity being applied over the particles lifetime. By default you are able to set a constant value for the X Y and Z dimensions. The drop down menu allows you to set a random between 2 constants, curves and a random between 2 curves for each dimension.
-Additionally you can set whether the velocity is being applied in World space or local space of the particle emitter. |
|
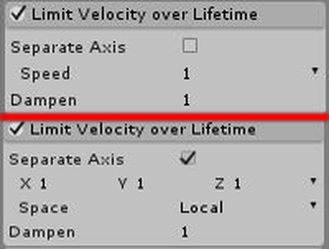
Limit Velocity Over Lifetime
Limit velocity allows you to control and limit the velocity of particles over their lifetime thus affecting their overall speed.
Separate Axis Seperate axis allows you to set a constant value for the X Y and Z dimensions. The drop down menu allows you to set a random between 2 constants, curves and a random between 2 curves for each dimension. |
|
Speed
Speed allows you to set the speed limit on particles over their lifetime. By default you are able to set a constant value for the speed. The drop down menu allows you to set a random between 2 constants, curves and a random between 2 curves. This gets hidden if Separate axis is enabled.
Dampen
Dampen controls how the particles that exceed their velocity limit are slowed down. A value of 1 is 100% and a value of 0.5 is 50%
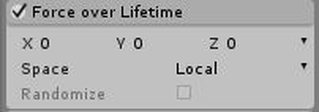
Force Over Lifetime
Force over lifetime affects the angular Force being applied over the particles lifetime. By default you are able to set a constant value for the X Y and Z dimensions. The drop down menu allows you to set a random between 2 constants, curves and a random between 2 curves for each dimension.
|
|
-Additionally you can set whether the force is being affected in World space or local space of the particle emitter.
Randomise
Randomise is only available when the values are set to either random between 2 constants or random between 2 curves. It creates a random value each frame for the force applied to each particle.
Randomise
Randomise is only available when the values are set to either random between 2 constants or random between 2 curves. It creates a random value each frame for the force applied to each particle.
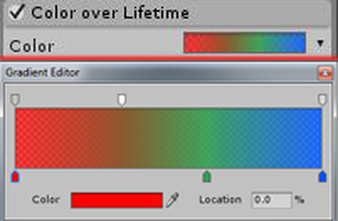
Colour Over Lifetime
Colour over lifetime allows you to control the hue of the particles over their lifetime through the use of a gradient. The gradient can be edited similar to the curve editor by putting keys on the colour timeline. From here you can also control the alpha over lifetime allowing you to control how the particles fade.
The location window at the bottom of the gradient window shows at what point (shown as a percentage) of the lifetime that the key is taking place. Up to 6 keys can be placed on either gradient. You also have the option to set it to randomly change between 2 colour gradients. |
|
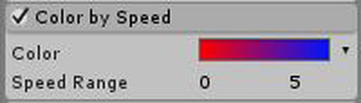
Colour by Speed
Colour by speed allows toy to control the colour of the particles based on their travel speed. This node also allows you to use a gradient to control this. The gradient can be edited similar to the curve editor by putting keys on the colour timeline. From here you can also control the alpha over lifetime allowing you to control how the particles fade.
|
|
The location window at the bottom of the gradient window shows at what point (shown as a percentage) of the lifetime that the key is taking place.
Up to 6 keys can be placed on either gradient. You also have the option to set it to randomly change between 2 colour gradients.
Speed Range
Speed range allows you to map the range of the particle gradient. The first value (on the left) value sets where the gradient starts to blend and the second value (on the right) specifies the end of the gradient.
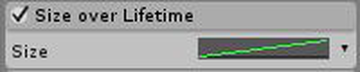
Size Over Lifetime
Size over lifetime allows you to control the particle size throughout their lifetime. This is done using a bezier curve by default. You can also set it to be a random between 2 constant values as well as a random between 2 curves.
|
|
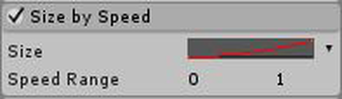
Size By Speed
Size by speed allows you to control the size of the particles based on their travel speed. This is done using a bezier curve by default. You can also set it to be a random between 2 constant values as well as a random between 2 curves.
|
|
Speed Range
Speed range allows you to map the range of the particle curve. The first value (on the left) value sets where the curve starts to blend and the second value (on the right) specifies the end of the curve.
Speed range allows you to map the range of the particle curve. The first value (on the left) value sets where the curve starts to blend and the second value (on the right) specifies the end of the curve.
Rotation Over Lifetime
Rotation over lifetime controls the angular orientation of the particles throughout their lifetime. By default this is done with a constant that controls the speed and direction of the rotation. This can be changed to select a random value between 2 constants, a curve and a random between 2 curves.
|

|
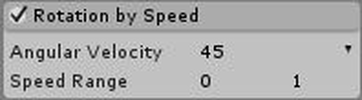
Rotation By Speed
Rotation by speed controls the angular orientation of the particles based on their movement speed. By default this is done with a constant that controls the speed and direction of the rotation. This can be changed to select a random value between 2 constants, a curve and a random between 2 curves.
Speed Range Speed range allows you to map the range of the particle gradient. The first value (on the left) value sets where the gradient starts to blend and the second value (on the right) specifies the end of the gradient. |
|
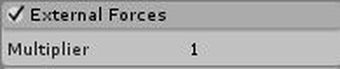
External Forces
External forces allows you to control the degree in which the particles are affected by things such as wind zones within the scene.
Multiplier Scales the amount of force that can affect the particles. |
|
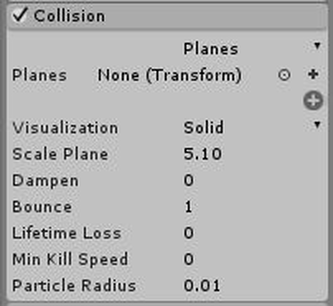
Collision
Collision node allows you to set and control collision planes for the particles as well as set up advanced world space collision parameters.
By default the collision is set to use planes as the collision transform, they start out empty but you can assign a mesh from the current scene to use as a reference transform (only a reference location not a collision mesh) or by pressing the little grey plus sign next to the space you can create an empty game object which is hen used as the collision plane. |
|
The larger grey plus sign is used to add more collision plane slots. Up to 6 slots can be created, when no longer needed you can press the small minus sign to delete the slot.
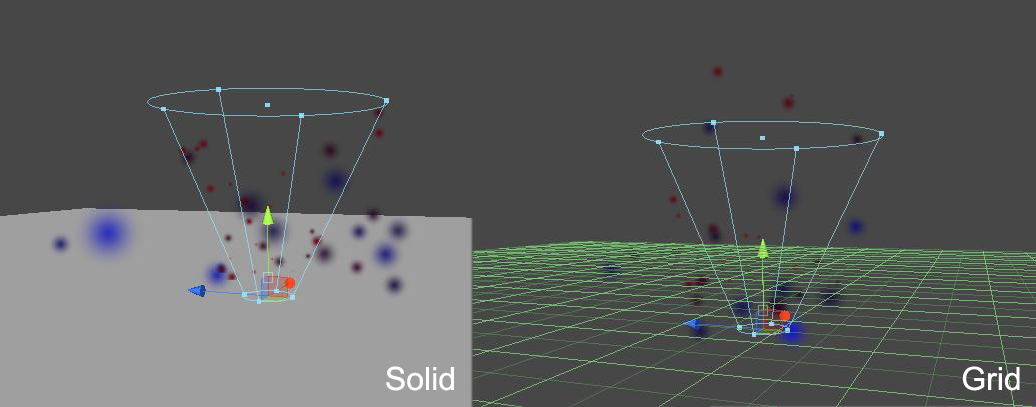
Visualisation
Visualisation only affects the render mode of the plane transform. This can be set to either solid; meaning that it just looks like a plane mesh. Or grid; which renders as a wire frame grid. This visualisation will not render during game play.
Scale Plane
Scale plane changes the size of the visualisation renders.
Dampen
Dampen lets you control how drastically the particle loses speed after colliding with the plane provided the value isn’t set to 0.0. This value is a percentage of the current speed so a value of 1 means 100% and the particle will stop moving, a value of 0.5 is 50% and the speed will be halved.
Bounce
Bounce controls the amount in which the particle rebounds off the collision normal. It affects how much upward motion is applied to the rebound.
Lifetime Loss
Lifetime Loss affects how much of the particles lifetime will be cut on collision with the plane. This value is a percentage so a value of 1 means 100% and the particle will die instantly, a value of .5 is 50% and the lifetime will be halved.
Min Kill Speed
Min kill speed lets you set a value in which if a particle collides and its current speed is below the value then the particle will die.
Particle Radius
Particle radius is the assumed average size of the particles used for collision purposes. Because particles are usually sprites their actual collision with the plain wont line up with what is rendered on the sprite.
Alternative to using planes for collision you can also set it to collide with the world meaning particles will be affected by whatever mesh's are around it within the scene. It has some similar options to the planes collision; Dampen, Bounce, Lifetime Loss, and Min Kill Speed. But there are also options unique to World collision.
Collides With
Collides with lets you specify what types of objects the particles can collide with, you can have Default, Transparent FX, Ignore Raycast and Water selected. The Everything option is just a quick select for all options and nothing is a quick deselect.
Collision Quality
Collision quality sets you set how reliable the particle collisions will be, ranging from Low to Medium to High. Higher levels are more expensive for the engine but lower settings will cause particles to “leak” and sometimes not detect a collision.
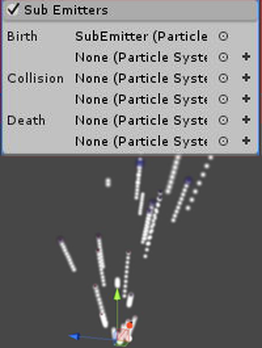
Sub Emitters
Sub emitters allow you to emit parented particle emitters from particles in the current system. Up to 2 sub emitters can be triggered by events.
-Birth: Emitter starts as soon as the particle is born. -Collision: Emitter starts when the particle collides with something. This sub emitter can only emit as a burst. -Death: Emitter starts at the particles death location. This sub emitter can only emit as a burst. |
|
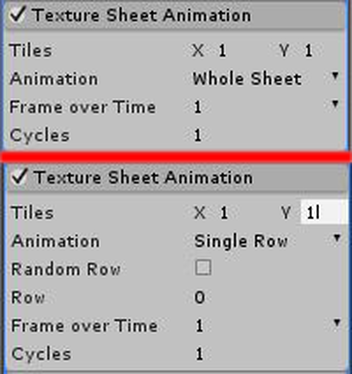
Particle Sheet Animation
Particle sheet animation lets you specify how your material is subdivided and then treats each subdivision as a frame in an animation. Very useful for fire or explosion particles amongst others.
Tiles Tiles lets you specify how many rows (X) and columns (Y) to make of the texture sheet. Animation Animation lets you specify whether the whole sheet is read as an animation sheet (going from left to right, top to bottom.) or if a single row is going to be read. When this is set to Single row it opens up unique options for that setting. Random Row: Random row specifies whether to pick a row at random. Row: If Random Row is disabled this option appears. It lets you specify which row to play. Frame Over Time Frame over time allows you to control the particle frames over the particles lifetime. By default it is controlled using a bezier curve with lifetime on the X axis and Frame on the Y axis. This can also be set to use a constant value, a random between 2 constants and a random between 2 curves. Cycles Cycles allows you to specify how many times the texture sheet animation plays per loop. |
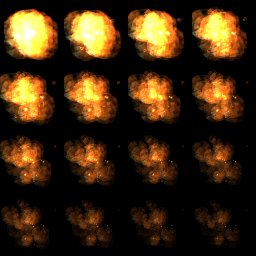
*Texture sheet example. not my work
|
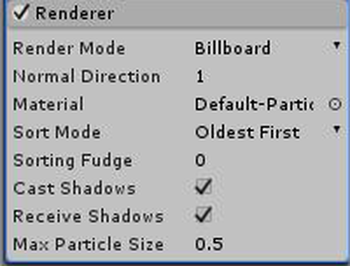
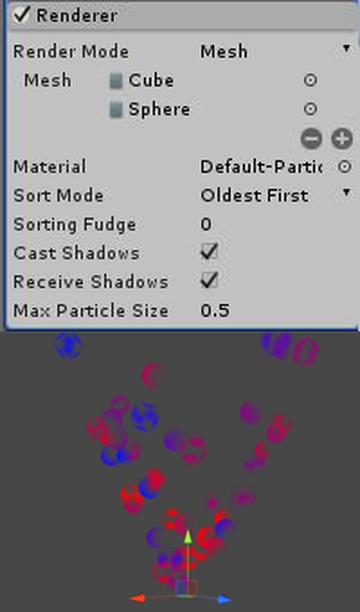
Renderer
Renderer allows you to edit the appearance of the particles from changing the material to their orientation to even whether they spawn as a sprite or a mesh.
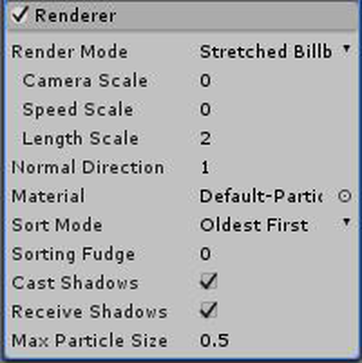
Render Mode: Render mode allows you to control how the particles themselves are rendered. By default they are rendered as 'Billboards' which are sprite planes that always face the camera. Other render modes from this menu include: Stretched Billboards Stretched billboards have many of the same features as billboards options. These ones differ in that they become elongated and are angled based on their angular velocity and speed. This render mode has unique sub options. Camera Scale: Camera scale controls the degree which the speed of the camera affects the length of the particles. Speed Scale: Speed scale controls the degree which the speed of the particles affects their length. -Length Scale: Length scale allows you to change the length of the particles based on their width. A value of 2 will make the particle twice as long as it is wide. |
|
Horizontal Billboards
Horizontal billboards renders the particles as sprite planes with their face normal fixed facing the Y axis.
Vertical Billboards
Vertical billboards renders the particles as sprite planes with their face normal fixed so that it cannot face in the Y axis.
Horizontal billboards renders the particles as sprite planes with their face normal fixed facing the Y axis.
Vertical Billboards
Vertical billboards renders the particles as sprite planes with their face normal fixed so that it cannot face in the Y axis.
|
Mesh
Mesh allows you to render a static mesh as a particle as opposed to using a billboard. Up to 4 mesh's can be added to this field and the emitter chooses a mesh at random every time it spawns a particle. However all mesh's can only be rendered with one material. Normal Direction Normal Direction allows you to tweak whether the normals are pointed at the camera. Any value above 0.0 will make the normal point towards the camera. I'm still not sure how this node works, I will update when I figure it out. This option is not available in the mesh render mode. Material Material allows you to define what material is rendered on the particles. If you have multiple mesh’s used in the particle renderer this material will apply to all of them. Sort Mode Sort mode affects how the particles are rendered in terms of overlapping. By default it is set to sort by distance. None: This disables alpha sorting of any kind, particles will not always render properly. |
|
By Distance: Sorting by distance is the default render sorting method and it renders the particles overlapping each other based on their distance to the camera in the world.
Youngest First: Sorting by the youngest to oldest will render particles further along in their lifetime under younger particles.
Oldest First: Sorting by the oldest to youngest will render particles further along in their lifetime over younger particles.
Sorting Fudge
Sorting fudge controls how much the alpha sorting will render particles in front of other transparent materials, including other particle systems. The higher the number the less likely it is to happen.
Cast Shadows
Cast shadows controls whether the particles will render shadows in dynamic lighting environments. Only opaque materials will cast shadows.
Receive Shadows
Receive shadows controls whether the particles have shadows cast on them in dynamic lighting environments. Only opaque materials will receive shadows.
Max Particle Size
Max particle size controls what percentage of the screen a particle can take up. A value of 0.5 will take up only 50% of the screen space.
