Dripping and puddle effect tutorial
Welcome to my third tutorial in the Unity Shuriken series. This will be a relatively short one going over an effect Ive come up with that's useful in some systems. This will be a dripping effect that leaves small (or large) puddles using a combination of the sub emitter node and the collision node. This effect relies on flat ground otherwise the puddles will clip into uneven terrain.
The effect in question can be seen in the particle showcase video below. Many of the systems in the video will be covered in future tutorials.
The effect in question can be seen in the particle showcase video below. Many of the systems in the video will be covered in future tutorials.
Start with a new system, or create a new emitter under the system you want to add this effect to, and name it. For this tutorial I will be making a bleeding effect as if a character is wounded and bleeding out. The idea behind this is the character can be tracked by the blood puddles for a while in case they slip away.
|
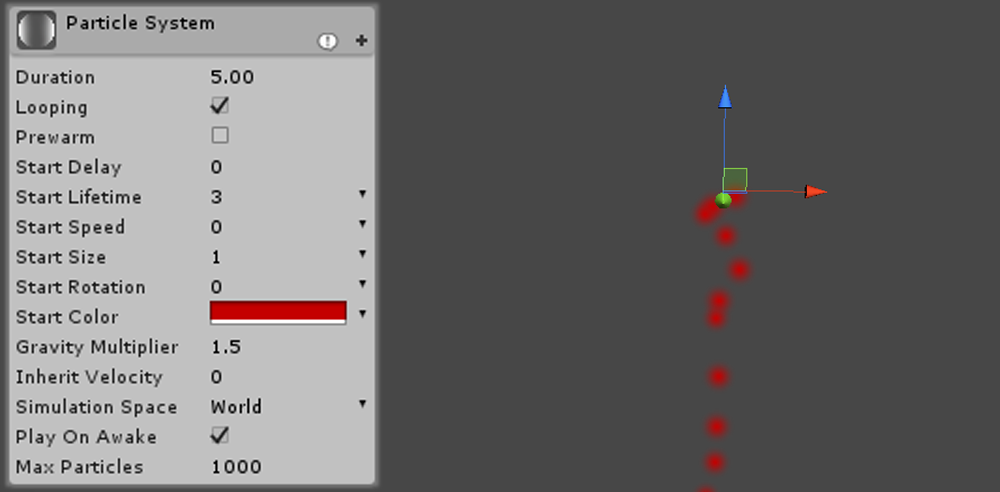
Firstly set the gravity multiplier to 1.5, this is generally the easiest way to make the particles fall consistently to the ground no matter what the orientation is. To help this set the start speed to 0 (unless you want the particles to spout out like a fountain before falling to the ground).
Now is a good time to also set your desired colour and the Simulation space. |
|
Setting the simulation space to world will make sure the particles aren't locked to their parent when translating making it look more natural if the parent object is moving.
|
Depending on the scale of your scene or characters you'll also change the start size at this point.
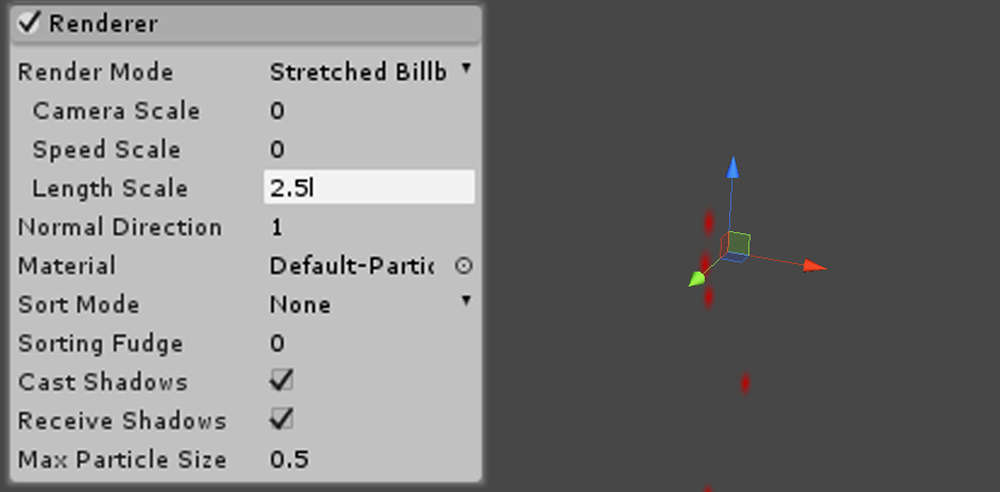
Now go down to renderer node. You can use your own material with this system but there are ways to avoid this. Make the default particles look more like drops by changing the render mode to stretched billboards and adjusting the length scale until they look more like drops. |
|
|
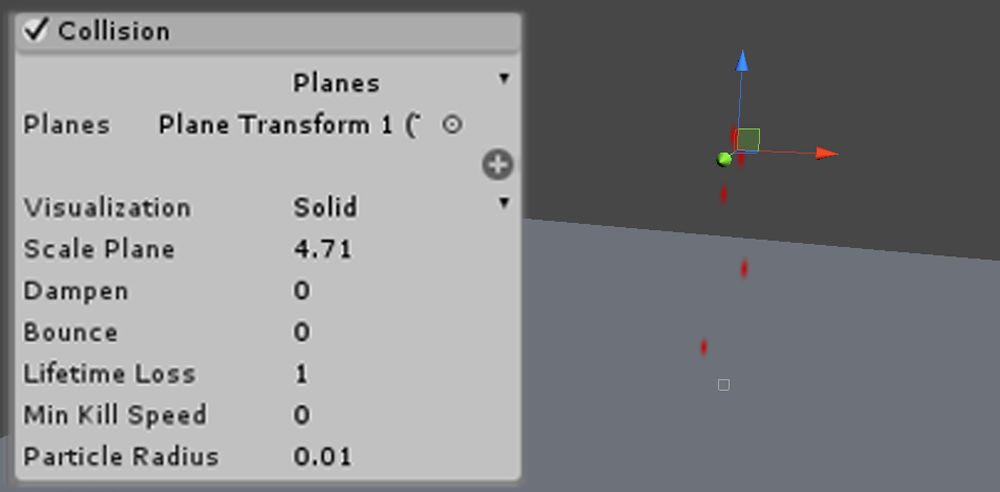
Now there are 2 ways to set the collision, one is more expensive as it relies on world collision and the other is where you set a collision plane where the particles always collide at a set height.
Click the tick on the collision node and ensure that the collision type is set to planes. Click the small plus sign (not the one in the circle) next to the box to add the default plane mesh in unity. Here you can add your own mesh but for this purpose just go with the default. |
|
The default position of the plane will be very odd, often starting out above the system and facing down, this is likely because its meant to react to the default destination of particles when the system is created. To change its location you will have to select it through the hierarchy, it will be a child of the particle system. Frustratingly the plane will not be visible unless the parent system is selected so you will have to gauge its location based on the widget and the transform.
Once its at a suitable height, set bounce to 0 to keep the particles from springing back up. Also set lifetime loss to 1. The numbers put into this field are taken as a percentage, for example if you put in .5 the lifetime of the particle will be cut in half after colliding with the plane, we set this to 1 to wipe out any remaining lifetime and kill the particle on collision.
Once its at a suitable height, set bounce to 0 to keep the particles from springing back up. Also set lifetime loss to 1. The numbers put into this field are taken as a percentage, for example if you put in .5 the lifetime of the particle will be cut in half after colliding with the plane, we set this to 1 to wipe out any remaining lifetime and kill the particle on collision.
|
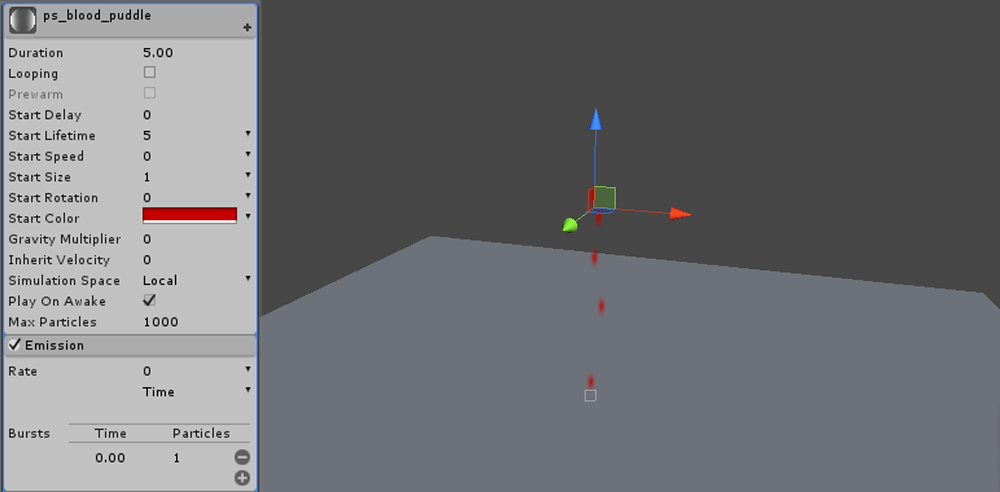
Now create a new particle system by clicking the small plus sign in the grey space to the right. This will be our puddle sub-emitter.
Start by ticking off looping (this will be a single small puddle that will spawn then disappear), set start speed to 0 and will be a good time to set the desired colour as well. Don't forget to set the simulation space to world, otherwise if the parent emitter is moved the puddles will vanish. |
|
Now go down to emission and put rate down to 0. Then add a particle burst by clicking the plus sign and reduce the particles down to 1.
And similarly to the particle glow in the fire particle tutorial, set the shape node to be a cube will all dimensions at 0, ensuring that the particle will spawn in the same place every time.
And similarly to the particle glow in the fire particle tutorial, set the shape node to be a cube will all dimensions at 0, ensuring that the particle will spawn in the same place every time.
|
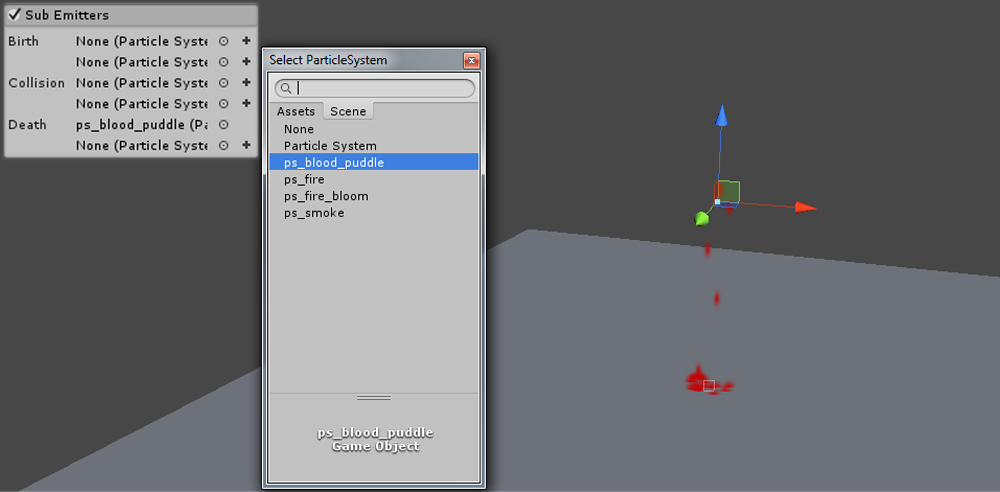
Now go back to the dripping emitter and go to the sub-emitters node and tick it on.
Click on the small circle next to one of the death boxes, this will make the puddle system emit at the location of each drops collision. Now it should be easier to edit how the puddles look when they spawn. |
|
|
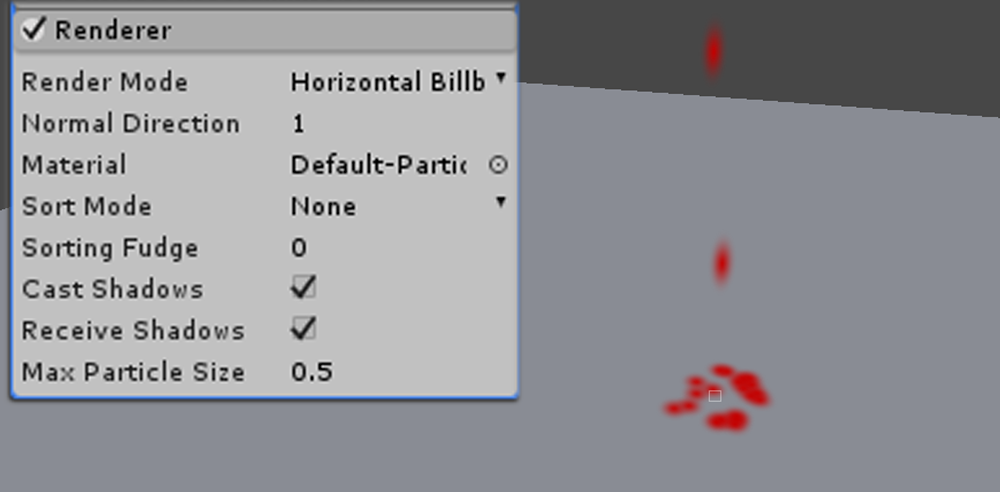
Now go back to the puddle emitter and to the render node. Set the render mode to horizontal billboard.
Now it looks more like drops leaving puddles on a flat surface. But the particles are small and quite static. Go back to the top settings in the emitter and adjust the start size of the puddles. |
|
|
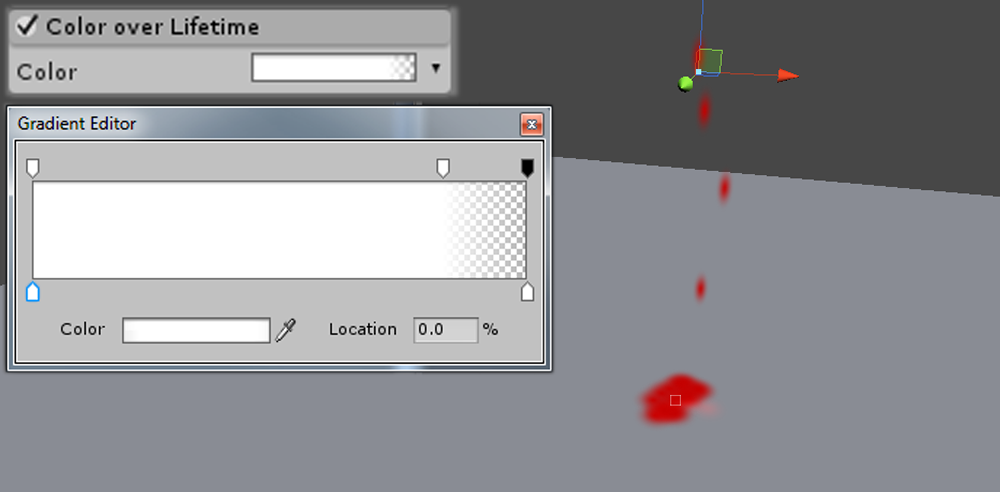
Next go to colour over life and set it so the alpha gradient fades out to 0% near the end to get a smoother transition when the particle lifetime fades out.
I did not do it in this tutorial but you can also set the colour to darken to mimic blood coagulating. I have seen very few games do this though. |
|
|
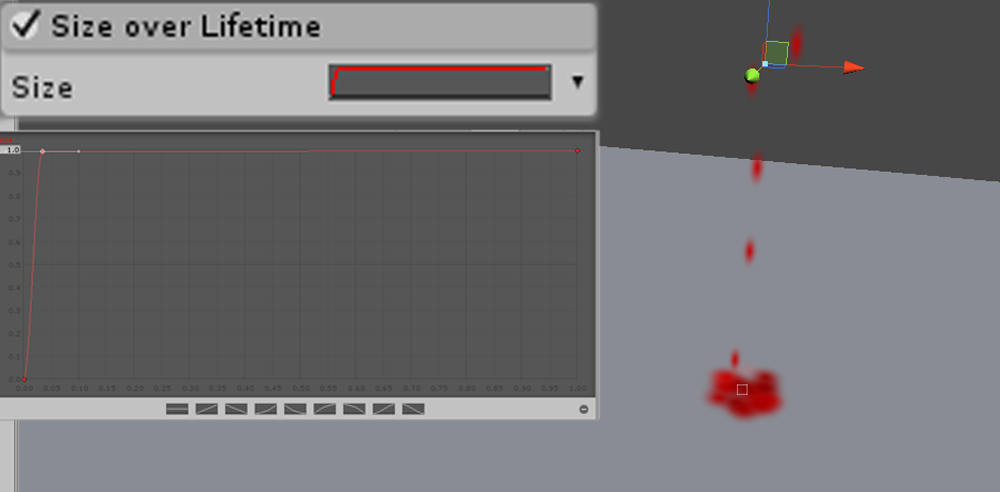
Next enable size over lifetime and place a key on the bezier curve very close to the beginning of the lifetime. Then take the very first key (the one at 0% of the lifetime) and bring it all the way down to the bottom. Now when a drop collides it has a nice spreading out effect.
|
|
Now is a good time to go back and tweak individual settings until you get the desired effect. This system will work well provided the particle system will always spawn at the same height, adjusting the plane transform could probably be achieved through a script.
|
Alternatively you can change the collision type by going to the dripping particle emitters collision node and switching it from plane to world. Don't forget to delete the plane transform from the hierarchy.
This can cause z fighting in the particles however (when 2 meshes or decals intersect and then flicker between eachother). |
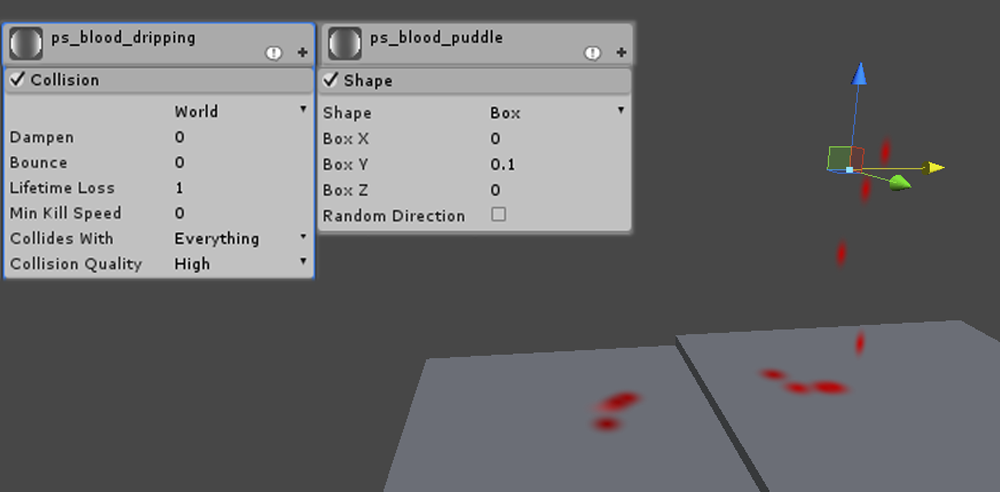
|
This can be solved by going to the shape node in the puddle emitter and setting the Y transform to 0.1, spawning them slightly above their collision location.
